Step 5: Configure the PowerShell PnP App
SPARK uses PnP PowerShell for to apply configurations that cannot be completed using the M365 Portals, Graph API or the Microsoft PowerShell modules.
Once the deployment is completed, you can remove this app registration.
Use the correct URL for your environment:
Worldwide (Commercial) & GCC
https://entra.microsoft.comGCC-High and DoD
https://entra.microsoft.us
Step 5a: Create the App Registration
-
Select App registrations from the left navigation menu
-
Click on + New registration

-
Enter
pnp-powershellfor the name of the application to register -
Click on Register to create the application

Step 5b: Remove the Default API Permissions
-
Select API permissions from the left navigation
-
Under Configured Permissions, click the ellipsis (…) at the top right side of the table and choose Remove all permissions
If permissions still remain, repeat this step until all of the default permissions have been removed from the app

Step 5c - Configure the API permissions using the Manifest
-
Select Manifest from the left navigation
-
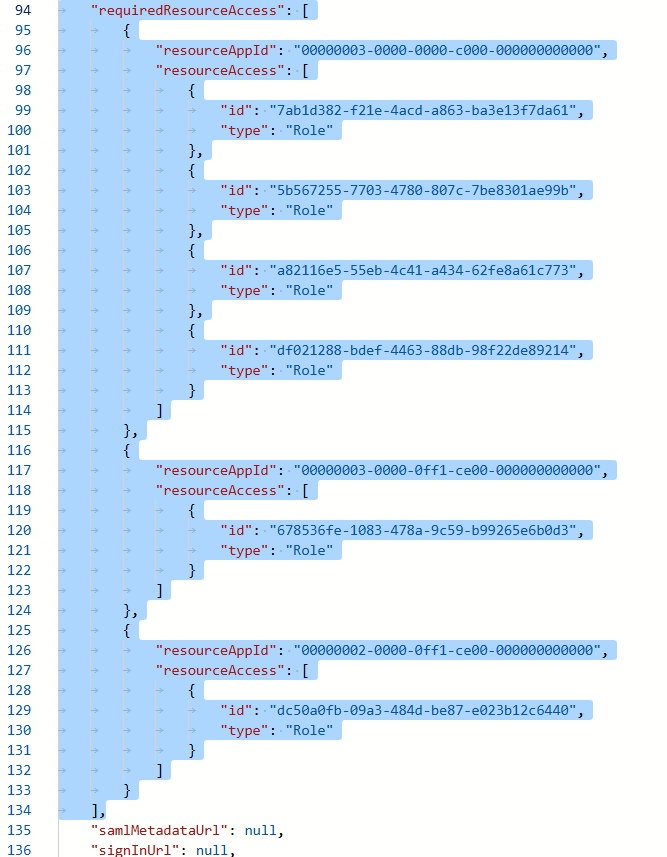
Find the requiredResourceAccess property.
-
highlight from “requiredResourceAccess: [“ to the comma after the closed bracket ] as shown in the figure below and delete the highlighted area.
- In the same section, copy and paste in the json code below:
1
2
3
4
5
6
7
8
9
10
11
12
13
14
15
16
17
18
19
20
21
22
23
24
25
26
27
28
"requiredResourceAccess": [
    {
        "resourceAppId": "00000003-0000-0000-c000-000000000000",
        "resourceAccess": [
            {
                "id": "9a5d68dd-52b0-4cc2-bd40-abcf44ac3a30",
                "type": "Role"
            },
            {
                "id": "06b708a9-e830-4db3-a914-8e69da51d44f",
                "type": "Role"
            },
            {
                "id": "a82116e5-55eb-4c41-a434-62fe8a61c773",
                "type": "Role"
            }
        ]
    },
    {
        "resourceAppId": "00000003-0000-0ff1-ce00-000000000000",
        "resourceAccess": [
            {
                "id": "678536fe-1083-478a-9c59-b99265e6b0d3",
                "type": "Role"
            }
        ]
    }
]
Then click Save.
Step 5d - Grant Admin Consent to the API permissions.
-
Select API permissions from the left navigation
-
Click on Grant API consent for Contoso
-
Click on Yes to approve the permissions requested

Step 5e: Apply the PowerShell PnP Certificate
Using the PowerShell PnP Certificate that you generated and saved in the Create a certificate for PnP PowerShell in the Step 0 - Prepare for SPARK the SPARK Deployment step.
-
Select Certificates and secrets from the left navigation
-
Click on Upload certificate
-
Browse and select the
SPARKAutomation_PnP.ceryou generated previously for this app. -
Click on Add to upload the certificate

- Expand the Thumbprint column
- Add the Thumbprint value to the

-
Click on
Overviewfrom the left navigation -
Annotate the Application (client) ID and Directory (tenant) ID` values

Step 6: Test PnP Connection
Open PowerShell 7.2+ is required for the latest PnP.PowerShell module. If you do not have PowerShell 7.2+, you can either:
-
Open PowerShell 7.2
-
Modify the script below with the values collected in the SPARK Deployment Workbook
1
2
3
4
5
# Template
#Connect-PnPOnline -Url <SPO Admin Url> -Thumbprint <Cert Thumbprint> -ClientId <App Reg Client Id> -Tenant <Tenant Id>

# Example
Connect-PnPOnline -Url https://GOVSPOTENANT-admin.sharepoint.com -Thumbprint  1A2B3C4D5E6F708192A3B4C5D6E7F8091A2B3C4D -ClientId 7c9e6679-7425-40de-944b-e07fc1f90ae7 -Tenant d1a2f3b4-5678-49cd-8c2a-8a7e0f124abc
-
Copy and Paste the script into your PowerShell terminal.
-
Validate the connection by running Get-PnPSite
